Tuesday, November 30, 2010

Advent time again!

Our advent list for this year includes:

1. Put up lights with daddy
2. Journey to Bethlehem
3. Wool Felt Heart ornaments
4. Breakfast with Santa at the Station
5. Make beeswax heart ornaments for the tree
6. Pick out Christmas tree with daddy
7. Recycled wrapping projects
8. Make snowglobe soaps for gifts
9. Paper star and ball ornaments with friends
10. Watching Christmas movie with popcorn and a treat
11. A surprise outing!
12. Go shopping for mommy with daddy
13. Zoo lights with hot cider
14. Paper hearts and bake something yummy!
15. Gingerbread houses
16. Paper snowflakes
17. Popcan gifts for friends
18. Special chocolate
19. Skating at the roller rink
20. Fantasy lights with hot cocoa
21. Christmas cookies for the neighbors
22. Fruit and Nuts dipped in Chocolate
23. Wrap gifts with mommy
24. Have a gnome bonfire with s’mores
25. Open Stocking!

Tomorrow, the fun begins!

Last years advent list, just in case more inspiration is desired.

signature

SHARE:

Thanksgiving Things

The heat is being fixed as I type this. I will sleep well tonight for the first time in 5 days! YAY!

Thanksgiving was wonderful! I had a wonderful time with our family who came up here to share it with us, and it was the only time the whole week the house was warm. I guess the stove, oven, and wood stove working together is what it takes without the heater on. So glad it's getting fixed!

I have a new trick to share with you. I haven't made the turkey for Thanksgiving in 4 years. And before that, I usually made it in those oven safe bags. I didn't have a whole lot of turkey tricks that made it well, I just did what the instructions told me, and we ended up with a cooked turkey that wasn't terribly dry. Not fantastic, but not bad and slathered in gravy that WAS fantastic (I make darn good gravy) it passed for a great meal.

Well this year, I was doing some research and started to find that if you allow the turkey to seal itself, as if you were searing meat for stew or a roast before cooking, then the inside would be more moist. I found some instructions and added my own flare to it and it made the world's most tender turkey ever!

Super Simple Moist Turkey Recipe

What you need:

15 - 20lb turkey, completely thawed
3 Tbs fresh thyme, minced
2 Tbs fresh sage, minced
1/2 stick room temperature butter
1/4 cup olive oil
salt and pepper

  1. This recipe is for a turkey that is NOT stuffed. I make stuffing in a separate dish when turkey is resting (and that is the other recipe I will share with you here)
  2. Remove gizzard and other inside stuff from bird.
  3. Place unstuffed turkey on a plastic board (one that can be placed in the sanitizing wash in the dishwasher) and gently pull up the skin on the breast part of the bird so it separates from the meat of the breast.
  4. Put the butter and herbs under the skin. You want it spread around between the skin and the breast meat. (Using your fingers is best, and I'll agree it is a little gross to do, but I promise, the result is worth it.)
  5. Brush the skin outside with the olive oil and liberally sprinkle with salt and pepper.
  6. Place the turkey in a oven safe baking dish with high edges. I used a 13 X 9 Pyrex dish.
  7. Preheat the oven to 475*. Yep, that's right. 475*. Place the turkey in the oven at 475* for 20 minutes.
  8. Turn down the heat to 250*. Yep, 250* and proceed to cook the turkey for 20 minutes per pound of turkey meat or until the meat reaches 165*. (I had so much drippings at this point that I had to remove a couple cups of them so they didn't over flow. So check that often, and take some out if you think there is danger of the drippings ending up on the bottom of you oven.)
  9. You don't have to baste. You don't have to touch it. You will have enough drippings for a huge batch of gravy and enough for the stuffing recipe on top of that. And your turkey (even the breast meat!!) will be tender and flavorful all the way through!

I honestly will never cook a turkey any other way. It was perfect, tasty and even the breast was moist and tender, never dry. I am sold.

The stuffing... awe the stuffing! I have never liked stuffing before, but this recipe was one I made up and includes all my favorite things. Martha Stewart had a 'how to put together stuffing' guide in the November 2000 Living and I happened to glean a copy from my mom a few years back. The guide basically said there were four major components to stuffing. The binder (eggs, water, butter, drippings), the bread, the herbs, and the fillers (fruit, nuts, meat, etc). So here is my recipe that I made up with that guide:

Pork Sausage and Pear Stuffing

Two pears (diced)
1 lb pork sausage (ground)
1 large bag cornbread stuffing squares
2 stalks celery (diced)
1 lg onion (diced)
2 sticks + 1 Tbs butter
1 tea Thyme leaves (dried)
2 tea fresh Sage leaves (minced)
1/2 cup yellow raisins
2 cups of chicken stock or drippings from turkey

1. Melt 1 Tbs of the butter in a large saute pan. Add sausage and break up until browned and crumbly. Take out of pan and set aside on paper towels to drain.

2. Melt the 2 sticks of butter in a large stock pot. Add 1 cup of stock or drippings. Toss the butter liquid with the cornbread stuffing until liquid and butter are gone. (If you need to add more drippings to moisten it all, then do that until the bread is moist but not wet.)

3. To the sausage pan (without washing) add the celery, onion, thyme, and sage. When onion turns mostly clear add in the diced pear, and saute' for another 5 or 6 minutes. If it starts to stick to the bottom at all, add drippings or stock to loosen it all up. You want the stuff on the bottom of the pan in the stuffing... it adds a lot of flavor.

4. When that is done, add the sausage back onto the pan and mix. Add raisins and turn over a couple times to coat them with flavor.

5. In a very large baking dish (I used a 10X15 Pyrex) put the stuffing bread, and the veggie sausage mix and toss. Add stock to moisten if you notice dry spots. (I usually use about 1/2 cup to a cup of drippings just to be sure it is all moist.) Cover and bake for 45 minutes at 350*. Take the cover off and cook for another 15 minutes to brown the top. If a dry, add the last cup of stock.

And my last Thanksgiving trick that I was able to pull off were these sweet little 'horns of plenty'. My niece and I made them together and then I filled them with pistachios, chocolates, and candies. Each plate had one and they looked so decadent on the place setting. It was a double layered cone, with off-white or chocolate colored solid cardstock on the inside, and gold, blue, and brown scrapbooking paper for the outside. Then I matched the other table arrangements to the paper. I used eucalyptus as my 'blue' and other greens for the 'floral', and then drilled tea light and taper sized holes in off-white gourds and added off-white and blue candles for the center piece. It was beautiful!

signature

SHARE:

Monday, November 29, 2010

For a day I will never forget...

Out of the night that covers me,
Black as the pit from pole to pole,
I thank whatever gods may be
For my unconquerable soul.

In the fell clutch of circumstance
I have not winced nor cried aloud.
Under the bludgeonings of chance
My head is bloody, but unbowed.

Beyond this place of wrath and tears
Looms but the Horror of the shade,
And yet the menace of the years
Finds and shall find me unafraid.

It matters not how strait the gate,
How charged with punishments the scroll,
I am the master of my fate:
I am the captain of my soul.

William Ernest Henley (1849–1903)

~~~~~~~~~~~~

Background for my deep thoughts on this day here:

November 29th, 2009

Thank you, to whatever gods may be, that my love is still safe here with me.

signature

SHARE:

Friday, November 26, 2010

What a ride!

What a strange week we have had. On Sunday it started snowing and snowed through Monday. We got about 2 inches of snow, most of it melted, and then we got 4 inches that night that stuck. The kids had a BLAST in the snow. Built snowmen, built forts, played until their fingers were blue with cold.

Tuesday we only got about another 1/2 inch or so, but the temperature dropped into the teens and the snow turned to ice or powder. It was not the time to play outside in the snow. It was time to hangout and drink hot cider and read cozy books under a blanket huddled like puppies.

Wednesday the temp was 11* by dawn and our pipes under our house had froze. We woke to no running water at all. Not even a trickle. We spent the morning trying to fix that and ended up putting a pipe warmer on the pipe we believed was effected under the house. Thank goodness we made a good guess! No pipe burst, and hopefully no ruptures either, but only time will tell. So far, no major leaks! We were very happy that we had dodged that bullet.

Little did we know, a bigger and much more expensive one was coming fast.

Thanksgiving morning, Don and I woke around 2am to our bedroom about 45*. We were FREEZING!! I went out into the livingroom to check on the heater while Don checked the weather. 16* outside... just as I discovered our heater was dead. Awesome. After building a fire in the wood stove and placing blankets over all the windows (and more on our kids), we warmed up the critter warmies and sent the kiddos back to bed. Don and I took turns jumping out of our warmish bed into the cold to check the fire and together we kept it going until dawn. As much as we really didn't like the idea, we knew we would have to wait it out until Friday to call for repair due to Thanksgiving.

Thanksgiving was wonderful after we heated up the house. The wood stove is horrible for heating up the bedrooms, but the main part of our rambler was a really nice temperature by the time that our guests arrived around 2. We had a wonderful meal, and I, although amazingly tired from being up most of the night, felt like I did a great job of getting everything out on time and together. I was so thankful for our friends and family... one of which brought us an extra load of wood so we didn't run out. We kept the wood stove going hot, and placed a fan in the hallway to direct some of the warmth down the hall and we all hung out in the warm part of the house and had good family time and amazing food!

I fell asleep the second everyone left... around 7pm.

When I woke at 1am, I didn't see my husband anywhere. When I went looking, he was dozing on the couch because the fire wouldn't stay lit. Luckily, when I checked the temperature outside the cold snap had passed (finally!) and over the next few hours I discovered that it was much easier to keep the house at a somewhat reasonable temperature when outside it was 37* and not 16*!

I stoked the fire and added a bunch of wood to the pile and let the man snore on.

This morning we called the repair people and it is going to be around a thousand dollars to repair our furnace. Oh, and they can't come until Monday.

I have been trying to keep the 'adventure' going with the kids. It has been hard to keep a positive attitude... especially with the lack of sleep. I have a few wood stove tricks I am going to try tonight to keep the fire going a bit better so we don't have to be up as much, but we may all just be sleeping in the livingroom this weekend right next to the fire.

I have some Thanksgiving recipes to share and even a new trick with our turkey (SO EASY!), but for now, I am going to go back into the warm part of the house and make some hot cocoa and watch a movie with my kids. I think "Elf" would be a fantastic choice. I could use a good laugh.

signature

SHARE:

Thursday, November 25, 2010

Happy Thanksgiving!!!!

Hope everyone is having an incredible holiday and their horn of plenty is filled with wonderful blessings for the season!!

signature

SHARE:

Tuesday, November 23, 2010

Snow!

Snow! This was yesterday. We lost all this and then through out the day and night we gained another 2 - 4 inches and everything froze. It is now about 22* outside and we are happily NOT out in the weather any longer. :)

signature

SHARE:

Friday, November 19, 2010

Me, in a magazine

A few months ago I started chatting with a woman from Homestead Gardens. She writes for their magazine and wanted to include one of my projects in their Winter addition. Yesterday, I got a package in my mailbox with a magazine that included my Yule Log project!

How cool is this?


The magazine also included a whole article on preserving a bounty of herbs from your garden, how to plant bulbs for beautiful early Spring flowers, and an article about how to spice up your dishes using in-season citrus fruit! I couldn't think of a better spot to put in one of my projects than in the midst of inspiration like this.

signature


SHARE:

{this moment}

Sorry... All I got is cell phone pictures for this week.

Outside:

And inside:

{this moment} - A Friday ritual. Inspired by SouleMama.

A single photo - no words - capturing a moment from the week. A simple, special, extraordinary moment. A moment I want to pause, savor and remember.

signature

SHARE:

Thursday, November 18, 2010

Belly

How do we know I am almost 7 mos pregnant?

Well, lets see... how about the finger prints on the mirrors I no longer care about? Or the flash that doesn't show my face to hide the bags under my eyes from not sleeping? Or how about the fact that I will post crazy silly pictures of myself on my blog for everyone to see just to have something to say today? Yes. All of thee above. ;) But here is the belly anyhow... 28 wks.

Midwives apt went great today. Everything is just as it should be. Little One (current favorite name Lucas Elliott) is growing and is STRONG! My feet (and my rear end) are wider than they ever have been, but my ankles are not swollen, so I am guessing they will go back (hopefully). My blood count and ultrasound scan from 20wks came in perfect! Even my iron is fine (which has been an issue in the past). Honestly, I am feeling better than I did physically a month ago. If I could sleep I could say this was almost comfortable right now. I am going to try a small dose of Valerian Root to see if I can stem the worst of the insomnia I am dealing with, and if that helps, 7 may be my lucky number!

I live in yoga pants and dh's tee shirts... but what frugal pregnant woman doesn't? I have been doing art just so I don't have to do housework (you know you are really sporting a big belly when you get out of breath bending over to switch out the laundry!) and I am really enjoying some of the crafts I am playing with (which of course, I will show you later).

All in all, I am feeling good.

signature

SHARE:

Wednesday, November 17, 2010

Stormy Weather

I sit in the warm house keeping the tea hot and the fire blazing while my husband and son tear down what is left of our side fence. The storm two days ago knocked down half of it and started throwing pieces of our wood shed around. All during that storm the kids and I sat in the house preparing for a power outage as the wind raged over head and branches fell from the trees above our house and scraped across our roof.

We lost power for all of one minute. It was an amazing storm though.

Down the street our neighbors suffered damage to their things too. One man we know had a branch the size of a small tree fall in front of his garage. I haven't yet talked to him to make sure his car wasn't under it.

Another storm is predicted for this weekend. This one is supposed to include snow. Welcome White Winter! Please, be gentle.

signature

SHARE:

Monday, November 15, 2010

Handcrafted Holiday ~ Critter Friends Wall Hanging Tutorial

This is how I made the wall hangings for the little boys new forest room. The original idea came from Maple Shade Kids on Etsy. She creates her decoupage wall hangings on sheets of well made plywood with beautiful varieties of scrapbook paper. Since I am more of a recycled decoupager (I doubt that's a word, but I am stickin' to it) I decided to use my favorite medium... old calendars!

There are many craft wood backgrounds in the craft stores, but the ones that appeal to me most are the ones with the rugged bark edges. I haven't bought many of them because I was never sure how they were sourced or if they were even from our country. This time I had a bit of digging to do, but found out that they are source in the USA and manufactured in Wisconsin. So, not local, but domestic. I was happy enough with the purchase to grab quite a few of them (Ie: I took their whole stock over a weeks period with quite a few coupons).

Ok... on to the how to. *glee*

Materials you need:

Mod Podge

paint brush

tacky glue

scissors

a good piece of well sanded wood

scrapbook paper or old calendars

hair dryer (trust me)


~~~~~~~~~~ Now the fun part ~~~~~~~~~~~~


#1: Collect inspiration:

This was the inspiration page for this project. I wanted a sleeping owl. So I put "Sleeping Owl" into Google Images and I picked the ones I liked, printed them out and designed my owl around these ones. The shape of the owl was from the pillow on the girls bed set. The eyes were from the drawing of the two owls on the tree. It all comes together in paper.

#2: Making your critter. Before you do any gluing on the board, lay out your design. If you really like the way your critter looks, use the tacky glue to glue him together as much as you can without putting any glue on the board. (Glue on the board doesn't come off. It soaks in like paint would.)

#3: Making the background design. Once you have your critter just the way you want him, design the area around him to fit. I wanted this to match the others for the boys room, so I used a similar twig and leaf design to tie it all in.

#4: Gluing your critter down. When you have everything just the way you want it (this can take hours... but it is a very fun process and it feels so good when you get it just right!!!) paint the back of your pieces with the Mod Podge and place them on the board. Make sure to coat the critter especially well so you don't get bumps or bubbles under the paper.

#5: Paint over the top of your critter and design. This part is pretty basic. Just slap the Mod Podge all over your design. Don't worry about being neat, it all dries clear. Do worry about getting around every corner and each piece. ALLOW TO DRY COMPLETELY! If you do not, there will be bubbles and all sorts of imperfections in your coat of Mod Podge. However, this is where the hair dryer comes in. Use one! It's awesome. An hour long process broken down into ten minutes of standing in the bathroom with your art work under the hot air. ;)

Adding more. . At this point you can not take anything off. However, you can add something if you feel you need to. I wanted to add an extra leaf to the bottom branch to round out that part of the picture. So I just went back to step #4 and glued in a third leaf.

#6: Sealing the picture. Paint over the whole thing. Even the bits you didn't put any paper on. This will make a clean, even coat over your design. You will need to do this at least twice. (Hairdryer!) and when you are done, you will need to let it sit in place for about 24 hours before it can withstand anything that may be damaging (dropping stuff on it, being laid on it's face so you can hang it, or most of all, water on it.)

And that's it! Tomorrow I will show you how to hang it. :)

For more of my decoupage designs (just in case they inspire you) here is the link to the Papercraft tab. Enjoy!

~~~~~~ Links to this project and a great way to find other amazing projects like this (Sorry, the hyperlink isn't working) ~~~~~

http://www.thethriftyhome.com/2010/11/60th-penny-pinching-party.html

http://www.oneprettything.com/?p=12577

signature

SHARE:

Sunday, November 14, 2010

Corn muffins with Pepper Jack cheese

YUM!

When the portabella mushroom and lentil soup came up on the menu binder rotation for the second time, I had one thought: "Must find something to go with it." Last time the lentil soup was wonderful but we ate it without anything else because it was a new recipe and I honestly didn't know what would go with the savory yet mild flavor. These muffins were PERFECT this time and I will for sure be making them again.

Corn Muffins with Pepper Jack Cheese

Dry ingredients:
2 cups corn flour
1 Tbs baking powder
1/2 tea kosher salt

Wet ingredients:
2 large eggs
2/3 cup sugar
1 cup cream
8 Tbs butter (melted, and yes, that's a whole stick)

-Mix dry ingredients in one bowl and wet in another, mix together until moist but do not overly mix.
-Add in 1/2 cup grated pepper jack cheese. Mix only until incorporated.
-Put in 12 baking cups.
-Cook for 11 - 14 minutes or until toothpick comes out clean and slightly brown on top.

Everyone went back for seconds except for my 3 year old son. Who said:

"Mama, dees muffins taste like... um like.... solid ROCK! .....Or fish."

The new recipe was a go with everyone else. (And I promise you, there was no 'fish' flavor or 'rock' texture... like at all. ;) )

signature

SHARE:

Friday, November 12, 2010

{this moment}

{this moment} - A Friday ritual. Inspired by SouleMama.

A single photo - no words - capturing a moment from the week. A simple, special, extraordinary moment. A moment I want to pause, savor and remember.

signature

SHARE:

Thursday, November 11, 2010

Belly, belly, belly...

Look how much I've grown....

Not the best picture ever, but I still have a hard time carrying around my portrait camera cuz it bumps the bump! So the phone camera will have to do. ;)

This was early last week. 26 wks and a few days here.

signature

SHARE:

Weekend evenings...

This month, our weekends are Tuesday through Thursday. This weekend has been WET! It poured all day Tuesday, we got a half a days worth of a break on Wed (in which we took a nice long drive to a zoo that we found out was closed on Wed from Nov through Feb. :P ), and then this morning it started pouring again. We have been doing lots of family evenings inside and lots of cocoa and popcorn with a fire and art projects... along with an occasional a family movie.

This weekend the family movie was E.T. The kids loved it, and I made sure to save Reece's Pieces back from their Halloween candy to go with the movie, which they thought was the best treat ever.

signature

SHARE:

Sunday, November 7, 2010

I think the nesting bug has hit (along with a few other ones as well)

Almost 27 wks... that's about time to dive into nesting, right?

I have been completely uninspired this year. This is strange for me. I am the queen-of-plan-ahead and I usually have at least half my projects done by now for the holidays, but no. Not this year. Between Candida, fleas, and a nasty bought of pregnancy insomnia, I am pretty much not myself... ever. This last week I have been thoroughly miserable. I got a flea in my jeans (literally) and it bit the entire bottom of my belly. And of course, it is the week after Halloween and anyone with Candida knows how hard it is not to overdo on the candy this time of year and make yourself miserable in other ways. I was an itchy mess!

So on to the not complaining... a few days ago I was talking to dh about ripping up the carpet in our hallways and bedrooms (our Nov project) and I got really inspired to 'do it right'. We are moving all the kids rooms around to make room for the new baby and I think the best way to paint and all that would be before the carpet comes out, one room at a time (so we don't get paint on the newly cleaned and decarpeted wood floor). The kids and I immediately started searching for ideas and inspiration for their new bedrooms.

As I was searching, I came across this from one of my favorite shops on Etsy (Maple Shade Kids):

I have been planning on doing something in the little boys room (Logan and the new baby) along the "forest theme" line for a while... but I hadn't found anything quite so perfect as this lady's work. I wish I could say that I could buy everything I love... but I can't. So I set out to recreate it, and for $5.22 (half off coupon at Micheal's) I got a couple craft boards, and between that and old calendars I had on hand, I made myself one:

Then today, I decided to tackle another:

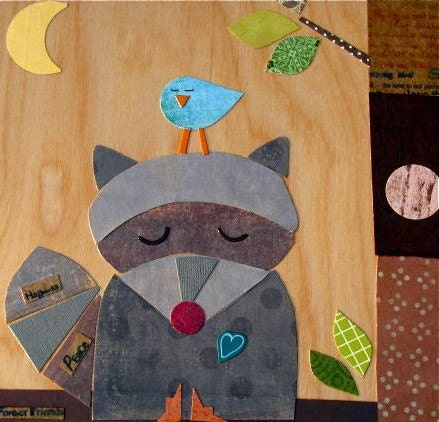
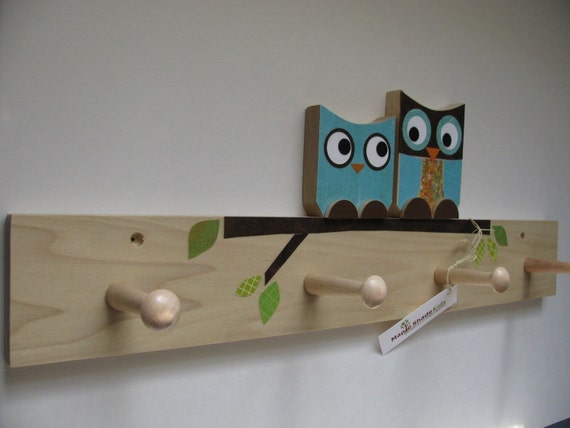
I am really excited about how these turned out. I am planning on making at least one more for the little boys room and perhaps buying this to go with it (I am not sure I could tackle making it... but perhaps):

On top of that, they are going to have these on their newly painted tan walls (without the words):

I am going to make them matching bedding and I am planning on bringing this out to use for the baby (I made it for Logan):

Collecting the Moments... Little's Corner

Although I doubt he will be in it more than once a month or so (we mostly co-sleep).

Feeling really excited about the inspiration (and the follow through) I was able to do! My notebooks are filling up with things to do before February, but I am just loving it. And I was thinking it would be a great idea to pass on to all those who are looking for Christmas projects right now! Seriously, it cost me $5 and about two hours for each of these adorable wall hangings. Isn't it just amazing what you can do when you feel inspired?

Now that I am feeling crafty again, does anyone have any awesome handmade gifts to share for older girls and boys? I still have two rooms to redo. ;)

signature

SHARE:
Blogger Template Created by pipdig